OpenWrt安装prometheus监控
一、修改Openwrt源

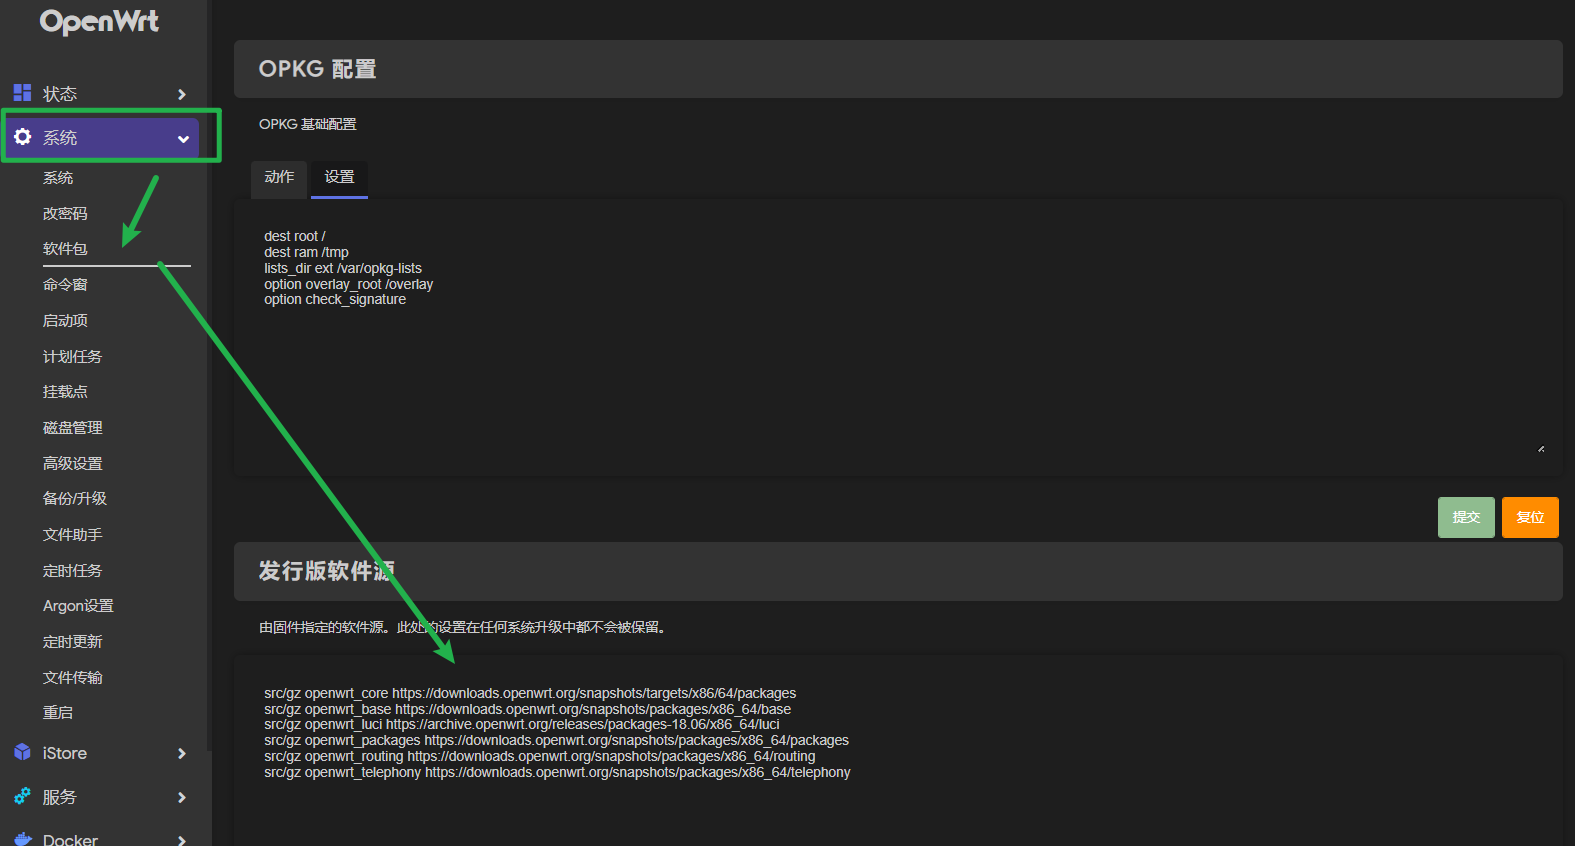
更换为Openwrt为官方源:(自己确定自己的系统版本:按照URL自己去查看替换即可Index of /releases/ (openwrt.org))
src/gz openwrt_core https://downloads.openwrt.org/snapshots/targets/x86/64/packages
src/gz openwrt_base https://downloads.openwrt.org/snapshots/packages/x86_64/base
src/gz openwrt_luci https://archive.openwrt.org/releases/packages-18.06/x86_64/luci
src/gz openwrt_packages https://downloads.openwrt.org/snapshots/packages/x86_64/packages
src/gz openwrt_routing https://downloads.openwrt.org/snapshots/packages/x86_64/routing
src/gz openwrt_telephony https://downloads.openwrt.org/snapshots/packages/x86_64/telephony
设置源
archive.openwrt.org走代理(否则有些地方无法访问,请根据自己网络环境设置)
更新源:
opkg update:部分更新失败,可能由于网络问题,稍后重试
二、安装Prometheus脚本
- 安装
opkg install prometheus-node-exporter-luaopkg install prometheus-node-exporter-lua-nat_trafficopkg install prometheus-node-exporter-lua-netstatopkg install prometheus-node-exporter-lua-openwrtopkg install prometheus-node-exporter-lua-wifiopkg install prometheus-node-exporter-lua-wifi_stations

- 配置脚本网络
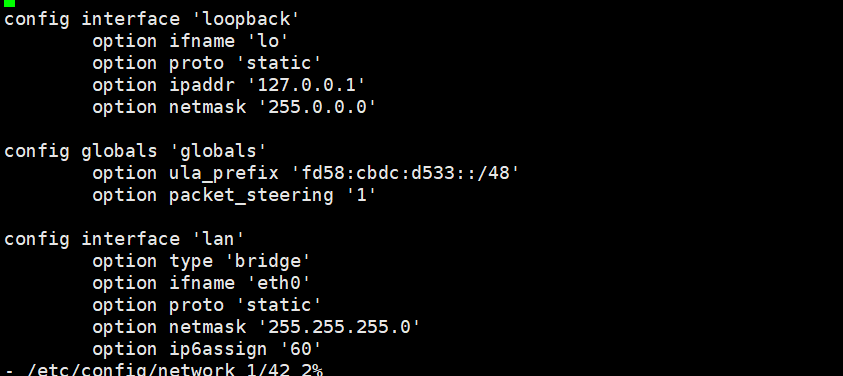
- 查看自己的网卡配置:
vi /etc/config/network
- 修改替换监控网络
sed -i.bak 's#loopback#lan#g' /etc/config/prometheus-node-exporter-lua
- 检查是否修改成功:
cat prometheus-node-exporter-lua
- 重新启动脚本:
/etc/init.d/prometheus-node-exporter-lua restart
三、检查是否安装成功
检查网络监听是否开启:
netstat -tulpn | grep 9100
查看脚本配置是否启动:
ps | grep prometheus
使用端口扫描工具
nmap检查端口:nmap 你的路由ip -p 9100
使用
curl获取监控数据:curl 192.168.0.2:9100/metrics# TYPE node_scrape_collector_duration_seconds gauge
# TYPE node_scrape_collector_success gauge
# TYPE node_nf_conntrack_entries gauge
node_nf_conntrack_entries 1819
# TYPE node_nf_conntrack_entries_limit gauge
node_nf_conntrack_entries_limit 65535
node_scrape_collector_duration_seconds{collector="conntrack"} 0.0001680850982666
node_scrape_collector_success{collector="conntrack"} 1
# TYPE node_boot_time_seconds gauge
node_boot_time_seconds 1662694233
# TYPE node_context_switches_total counter
node_context_switches_total 54301646
# TYPE node_cpu_seconds_total counter
node_cpu_seconds_total{cpu="cpu0",mode="user"} 2126.74
node_cpu_seconds_total{cpu="cpu0",mode="nice"} 340.49
node_cpu_seconds_total{cpu="cpu0",mode="system"} 2844.26
node_cpu_seconds_total{cpu="cpu0",mode="idle"} 273454.86
node_cpu_seconds_total{cpu="cpu0",mode="iowait"} 3.12
node_cpu_seconds_total{cpu="cpu0",mode="irq"} 0
node_cpu_seconds_total{cpu="cpu0",mode="softirq"} 11707.05
node_cpu_seconds_total{cpu="cpu0",mode="steal"} 4301.32
node_cpu_seconds_total{cpu="cpu0",mode="guest"} 0
node_cpu_seconds_total{cpu="cpu0",mode="guest_nice"} 0
node_cpu_seconds_total{cpu="cpu1",mode="user"} 2203.07
node_cpu_seconds_total{cpu="cpu1",mode="nice"} 339.14
node_cpu_seconds_total{cpu="cpu1",mode="system"} 2590.75
node_cpu_seconds_total{cpu="cpu1",mode="idle"} 272803.85
node_cpu_seconds_total{cpu="cpu1",mode="iowait"} 8
node_cpu_seconds_total{cpu="cpu1",mode="irq"} 0
node_cpu_seconds_total{cpu="cpu1",mode="softirq"} 12972.49
node_cpu_seconds_total{cpu="cpu1",mode="steal"} 3867.58
node_cpu_seconds_total{cpu="cpu1",mode="guest"} 0
node_cpu_seconds_total{cpu="cpu1",mode="guest_nice"} 0
# TYPE node_intr_total counter
node_intr_total 554010900
# TYPE node_forks_total counter
node_forks_total 804483
# TYPE node_procs_running_total gauge
node_procs_running_total 2
# TYPE node_procs_blocked_total gauge
node_procs_blocked_total 0
node_scrape_collector_duration_seconds{collector="cpu"} 0.00092601776123047
node_scrape_collector_success{collector="cpu"} 1
# TYPE node_entropy_available_bits gauge
node_entropy_available_bits 3413
# TYPE node_entropy_pool_size_bits gauge
node_entropy_pool_size_bits 4096
......
上面检查无误即配置成功!
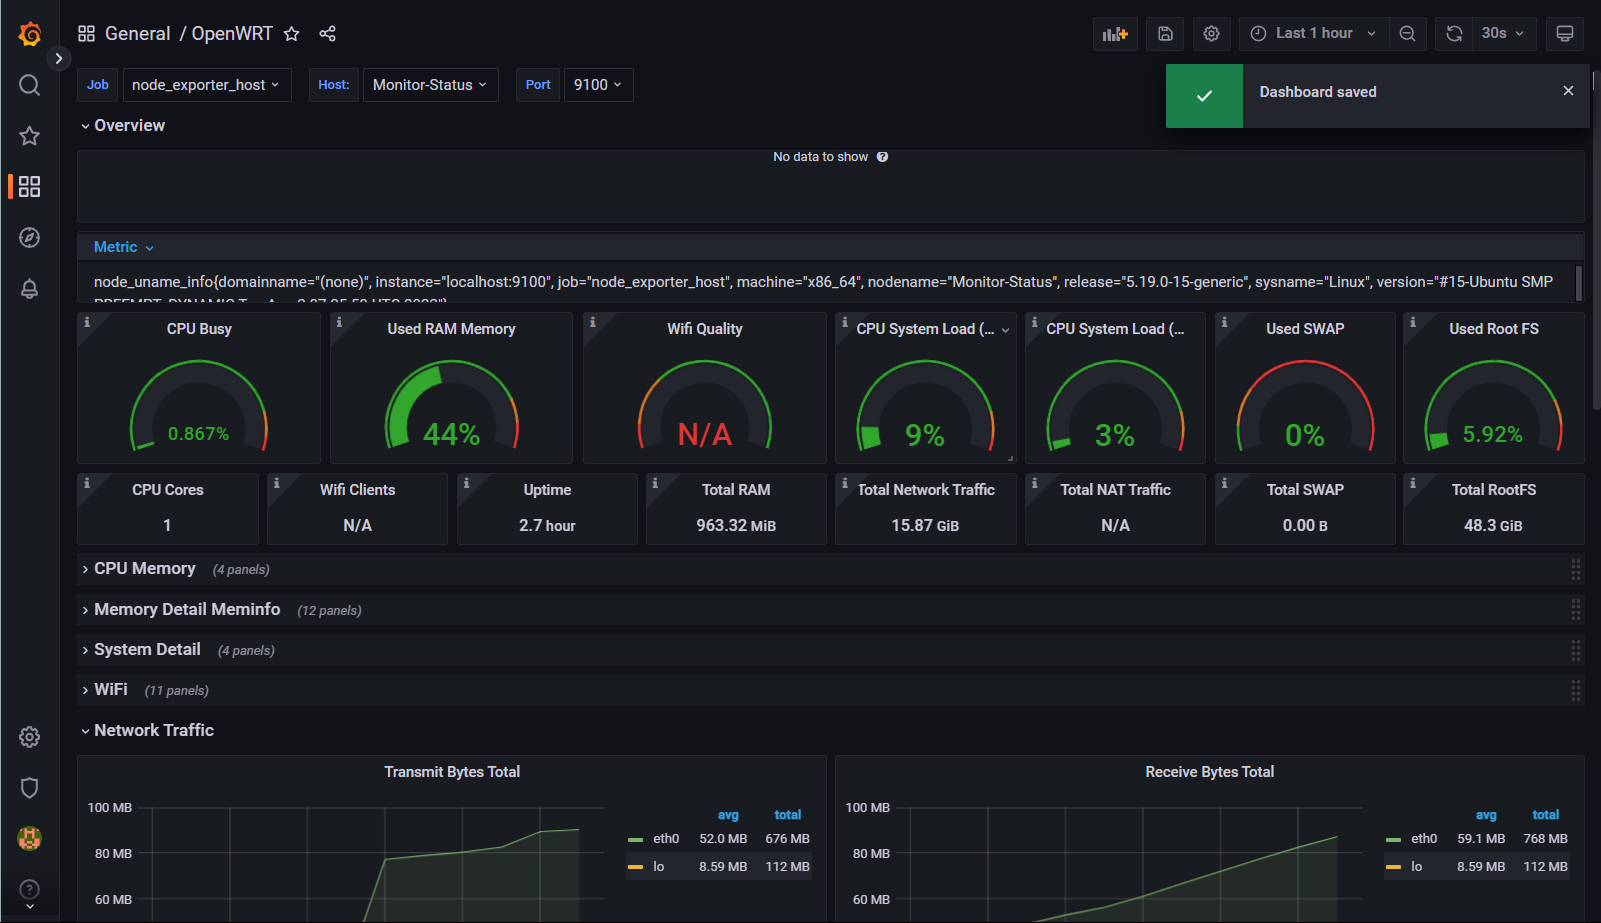
四、配置Grafana
导入模板:11147 -> OpenWRT | Grafana Labs

本博客所有文章除特别声明外,均采用 CC BY-NC-SA 4.0 许可协议。转载请注明来源 Bai's Blog!
